If you are looking up how to prevent frozen pipes, you are asking at exactly the right time. October is the window. Once Hempstead's first hard freeze hits (usually sometime in December), the time for prevention is over, and you are into emergency territory. Everything below is what we tell our own neighbors every fall, in the order that matters.
Why Hempstead homes are especially good at freezing pipes
It is not just "cold weather." Three things about this village make frozen pipes a local specialty:
First, the housing stock. A huge share of Hempstead Village homes went up before 1960, back when running a supply line through an exterior wall or an unheated attic seemed fine. Those pipes are still there, and they are the first to freeze. There is one more local factor working against you: Hempstead's municipal water is highly corrosive (a Langelier Saturation Index of negative 2.09). Over decades, it thins copper pipe walls from the inside out. A pipe already thinned by corrosive water bursts at lower pressure than a new pipe, which means Hempstead's older plumbing fails sooner in a freeze than the same pipe would in a town with gentler water.
Second, the freeze thaw cycle. Long Island does not just get cold and stay cold. We get cold snaps, then a 45-degree day, then another snap. That cycling is brutal. Water freezes, expands, thaws, and the pipe weakens a little more each round until one January night it lets go.
Here is what most people get wrong about why pipes burst. It is not the ice expanding against the pipe wall that breaks it. Research by Jeffrey R. Gordon at the University of Illinois (1996) proved the real killer is hydraulic pressure. When ice forms a solid plug inside the pipe, it traps liquid water between the ice and your closed faucet. That trapped water has nowhere to go. As more ice forms, pressure spikes past 2,000 PSI inside the pipe, and it ruptures at its weakest point, often several feet away from where the ice actually is. This is why dripping a faucet works: it is not about keeping water moving, it is about giving that pressure somewhere to escape.
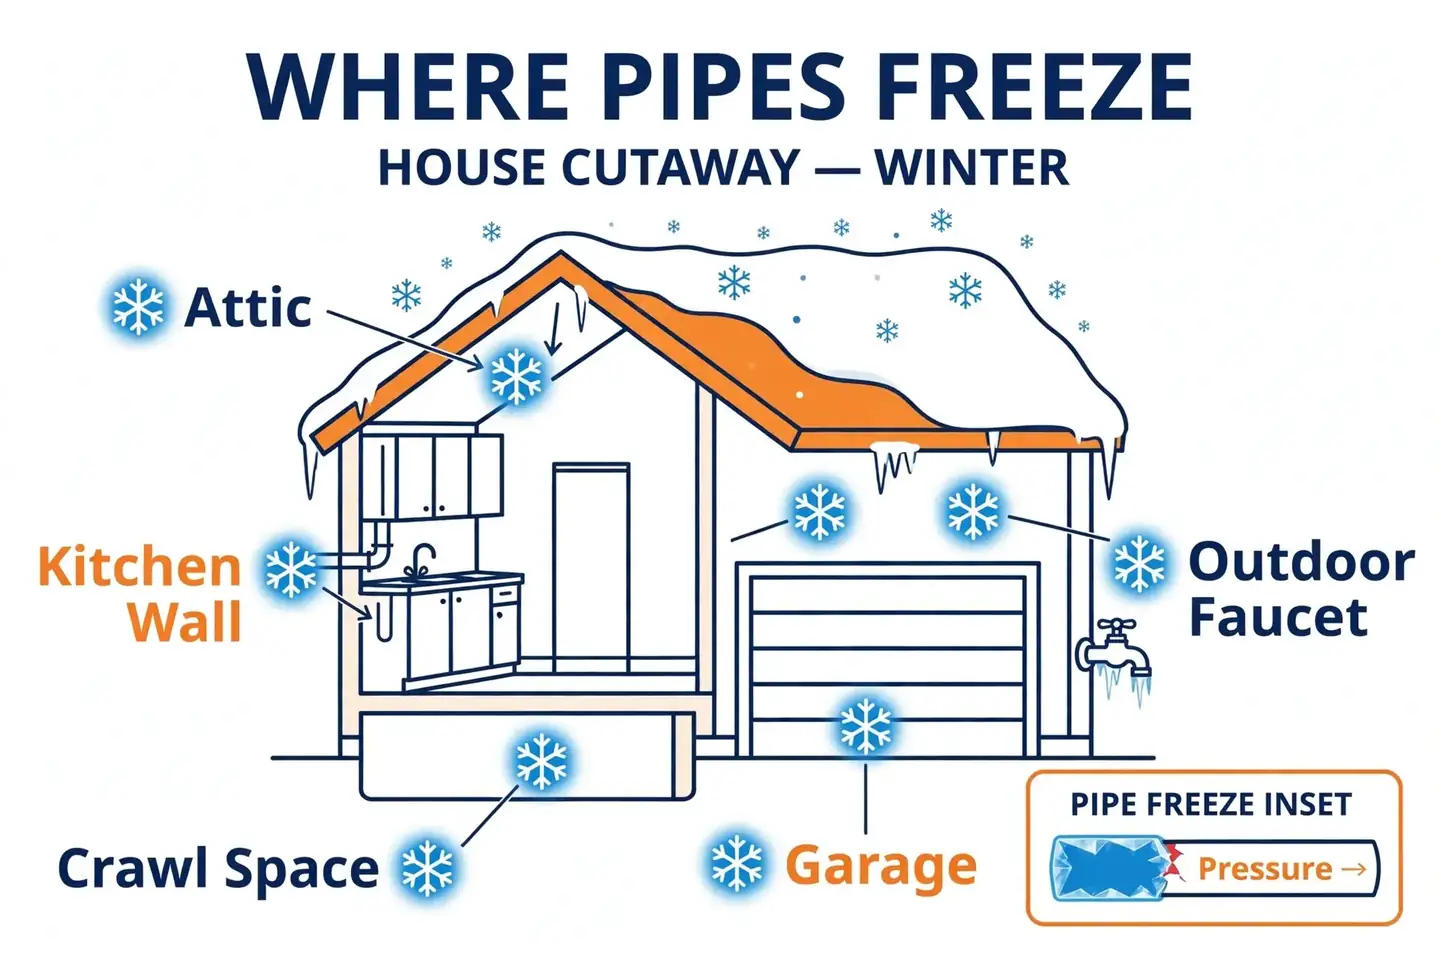
Third, the spots nobody thinks about. The pipes that freeze are almost never the ones you see. They are in the crawl space, the garage wall, the attic above the bathroom, behind the kitchen sink on the outside wall. Out of sight until 2 a.m. when there is no water, or worse, water everywhere.
8 things to do before December
Do these in order. The first three handle most of the risk.
1. Insulate every exposed pipe you can reach
Foam insulation sleeves are the cheapest prevention in plumbing. They cost $1 to $3 per linear foot at any hardware store, and slipping them on is a genuine DIY job. Slit side down, tape the seams, done in an afternoon. For a typical basement run of 80 to 120 feet, you are looking at $60 to $150 in materials.
A professional whole house insulation job runs $350 to $850 on average (HomeAdvisor 2025 data), more if pipes are buried behind finished walls. If your pipes are easy to reach, DIY it. If they are not, that is what we are for.
2. Put heat tape on the worst sections
For the pipe that always worries you, the one along the garage wall, the hose bib that froze in 2023. Insulation alone may not cut it on the coldest nights. Self regulating heat cable (heat tape) is the answer. A 25-foot roll costs $35 to $80, plugs into a standard outlet, and its built in thermostat switches on around 43°F and off around 55°F, so it only runs when it needs to.
Two safety rules: buy cable that is UL/ETL listed for water pipes, and never plug it into an extension cord. That is how fires start. If there is no outlet nearby, have an electrician add one. The $150 outlet is cheaper than the alternative.
3. Shut off and drain your outdoor hose bibs
This is the single most skipped step and the single most common freeze we see. Before the first hard freeze: shut off the interior valve to each hose bib, open the outside faucet, and let it drain. Leave it open all winter. A $10 foam bib cover on top is cheap insurance.
4. Seal the drafts around pipes
Cold air pouring through a gap around a pipe defeats insulation completely. Check where pipes pass through exterior walls, the sill plate, and around basement windows. A $6 can of expanding foam or a tube of caulk closes the gaps that matter.
5. Keep the heat at 55°F or higher, even when you are away
Turning the heat way down for a long weekend in January to save $30 is the most expensive savings you will ever attempt. Keep it at 55°F minimum. If you will be gone more than a couple of days in deep winter, have someone check the house, or shut off the main and drain the system.
6. Open cabinet doors on exterior walls during cold snaps
When the forecast says single digits, open the cabinet doors under sinks on exterior walls so warm room air reaches the pipes. It looks odd. It works.
7. Find your main shutoff valve right now
Not in January. Now. Go find it, make sure it turns, and make sure everyone in the house knows where it is. If it is a 1950s gate valve that has not moved in a decade, have it replaced before you need it. A valve replacement runs $120 to $250 installed, versus a flooded basement at 2 a.m.
8. Drip BOTH hot and cold faucets during extreme cold
When the forecast shows single digits overnight, open the faucet farthest from where water enters your house to a pencil thin trickle. Here is the part most guides get wrong: drip both the hot and cold sides, not just cold. Once the water sitting in your hot water line cools to room temperature overnight, it freezes just as fast as the cold line. A single lever faucet set to warm covers both. And remember why this works: it is not friction keeping the pipe warm, it is pressure relief. That open faucet is the escape valve for the hydraulic pressure that actually bursts pipes.
The thermostat number that matters: 55°F. You will see 45°F or 50°F quoted on some sites. The authoritative standard from Roto-Rooter, Mr. Rooter, and national plumbing guidance is 55°F minimum, and here is why it is not negotiable in Hempstead: your thermostat sits in a warm hallway, but the pipe sits inside an exterior wall cavity that runs 5 to 10 degrees colder. Set the hall to 50°F and the pipe is sitting at 40°F, right in the freeze zone. 55°F at the thermostat keeps the coldest pipe above freezing.
What you can DIY vs. when to call a plumber
Safe DIY: foam sleeves on exposed pipes, plug in heat tape where an outlet already exists, draining hose bibs, sealing drafts, and thawing a frozen but not burst pipe with a hair dryer or space heater, slowly, starting at the faucet end. Never an open flame, ever.
Call a licensed plumber: replacing shutoff valves, anything involving soldering or torch work, rerouting pipes away from exterior walls, opening finished walls, or anything on the water main. And here is the practical reason, not just the safety one: if a pipe bursts after DIY work, your insurance carrier will ask for the plumber's invoice. Keep us in the loop on anything beyond insulation.
What prevention costs vs. what a burst costs
Full fall prevention for a typical Hempstead house: $60 to $150 in DIY materials, or $400 to $1,500 for a professional package (insulation, heat tape, a plumber walk through, and a valve replacement or two).
One burst pipe with water damage: $500 to $5,000, and that is before you count the deductible, the days of disruption, and the things water ruins that money cannot replace. Prevention is not close. It is not a decision.
The bottom line
Learning how to prevent frozen pipes is a one afternoon project that pays for itself the first winter it matters. Insulate what you can reach, tape what worries you, drain the hose bibs, and find that shutoff valve. Do it in October, while it is still a chore and not an emergency.
And if you would rather have a plumber walk the house and handle it all in one visit, that is literally what fall is for. Call +1 (516) 969-2004. We have been keeping Hempstead Village pipes unfrozen for 20+ years.